Field Notes · from Field Trip

Build a research-heavy deck that sticks to your sources with Gemini Notebook

A step-by-step walkthrough: open Gemini Notebook, add your documents, see everything it can make from them, and turn them into a slide deck that sticks to your sources.

Data & Reporting
Gemini

Copy this prompt

Using only the sources in this notebook, create a slide deck for the school board summarizing what changed between last year's program report and this year's. One slide per major change, and note which report each point came from.

The job

Board reports, program reviews, and grant summaries pull from many documents at once, and every claim has to hold up. Gemini Notebook (formerly NotebookLM) is built for this: you give it your documents, and it answers and creates only from that material. This walkthrough takes you from an empty notebook to a finished deck.

Every screenshot below uses made-up Garden School District reports.

Step 1: Open Gemini Notebook

  1. Go to notebook.google.com. Old notebooklm.google.com links still work and redirect there.
  2. Sign in with your school Google account, not a personal Gmail.
  3. Click New notebook in the top right.
  4. Click "Untitled notebook" at the top and give it a clear name, like "Attendance Program Review." Keep one topic per notebook so answers stay focused.

Step 2: Add your sources

Click Add sources. You'll see every way to bring material in:
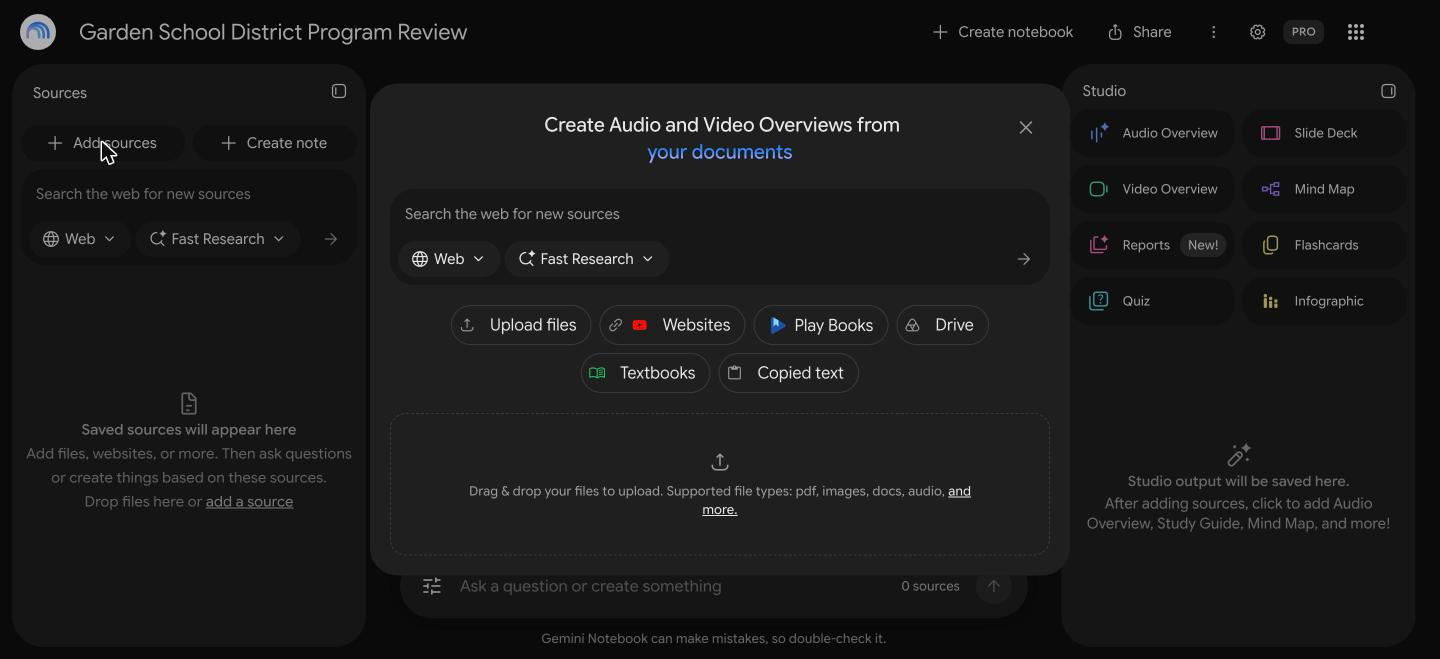
Gemini Notebook Add sources dialog with options for Upload files, Websites, Play Books, Drive, Textbooks, and Copied text.
The Add sources dialog.
  • Upload files: PDFs, Word documents, PowerPoints, text files, images, and audio. You can also drag files straight onto the dialog.
  • Drive: pick Google Docs, Slides, or Sheets from your Drive. This is the easiest route for most district documents.
  • Websites: paste a web page or YouTube link. Gemini Notebook reads the text of the page or the video's transcript.
  • Copied text: paste text straight in, like an email or meeting notes.
  • Play Books and Textbooks: add books you have access to.
  • Search the web for new sources: the search box at the top finds web pages for you to add.

Most accounts can add up to 50 sources per notebook. Once they're in, they show up in the Sources panel on the left. Use the checkboxes to choose which sources Gemini uses for each question or output.
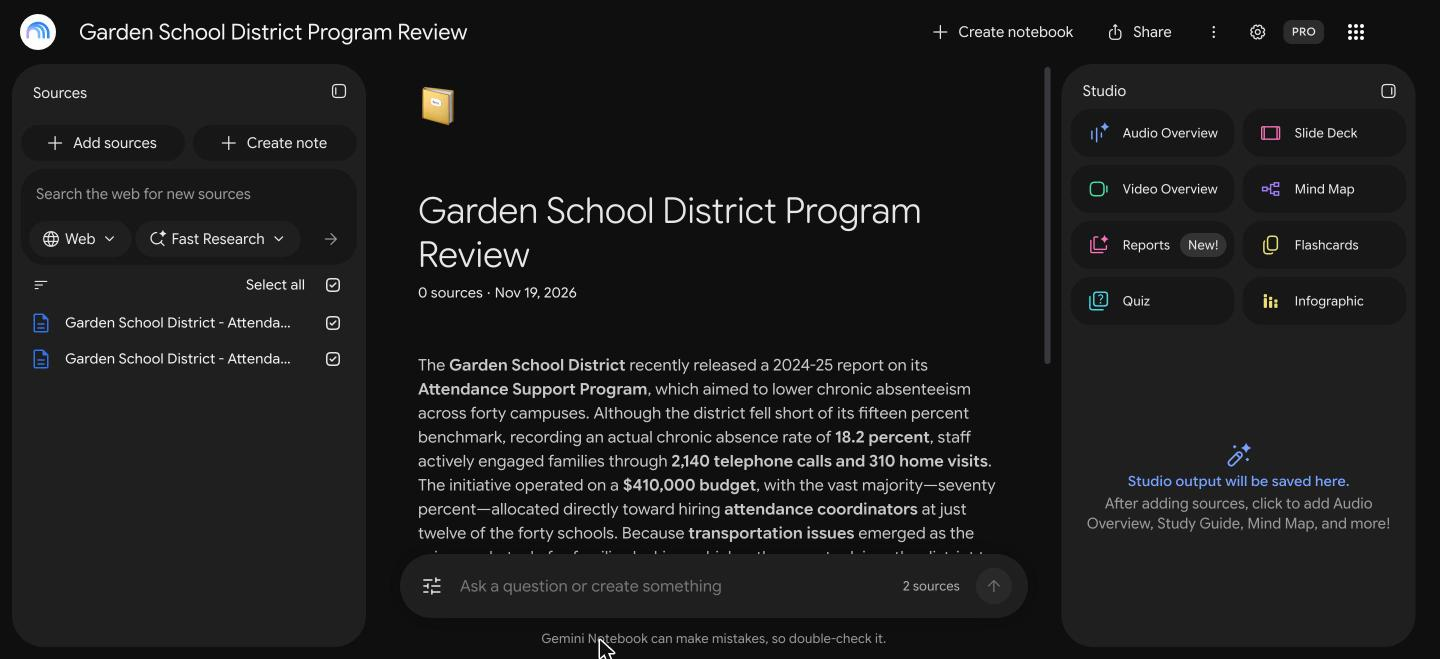
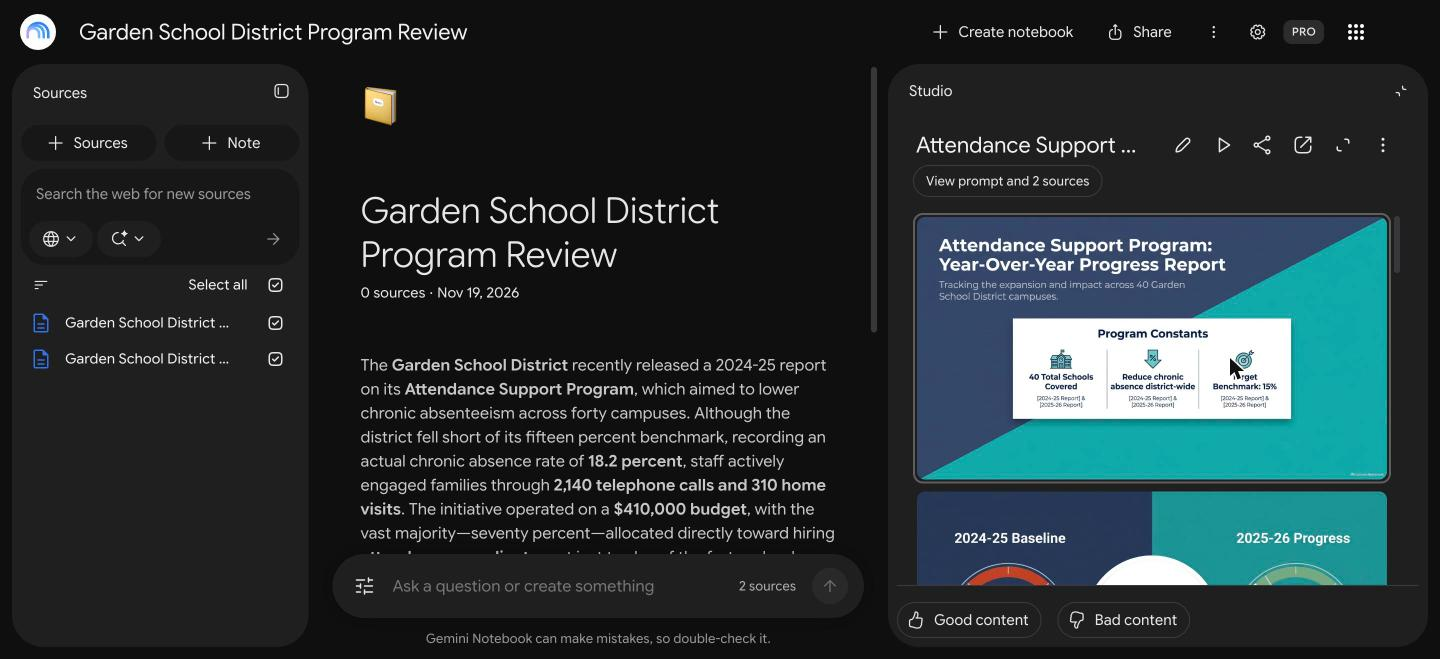
A Gemini Notebook with two sources in the left panel, an automatic summary in the middle, and the Studio panel on the right.
Sources on the left, an automatic summary in the middle, and the Studio panel on the right.

Step 3: Ask questions

Use the box at the bottom ("Ask a question or create something") the same way you'd ask a colleague who has read every document. Try "What changed between the two reports?" or "Where did we miss our targets?" Answers come only from your sources and link back to where each point came from, so you can check them.

Step 4: Pick what to make in Studio

The Studio panel on the right turns your sources into finished pieces:
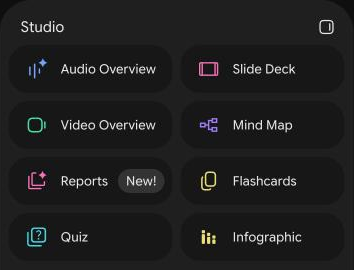
Gemini Notebook Studio panel with Audio Overview, Slide Deck, Video Overview, Mind Map, Reports, Flashcards, Quiz, and Infographic.
Everything Studio can create.
  • Audio Overview: a podcast-style conversation between two AI hosts about your sources. Good for a commute-length briefing.
  • Video Overview: a narrated explainer video. It can take a while to generate.
  • Slide Deck: a full presentation built from your sources. See Step 5.
  • Mind Map: a visual map of the main topics and how they connect. Useful for getting oriented in a long policy or handbook.
  • Reports: a briefing document, study guide, FAQ, or a custom report you describe.
  • Flashcards and Quiz: practice questions from your material. Handy for staff training on a new procedure.
  • Infographic: a one-page visual summary.

Everything you create is saved in the Studio panel so you can come back to it.

Step 5: Make the slide deck

Click Slide Deck to open the customize window:
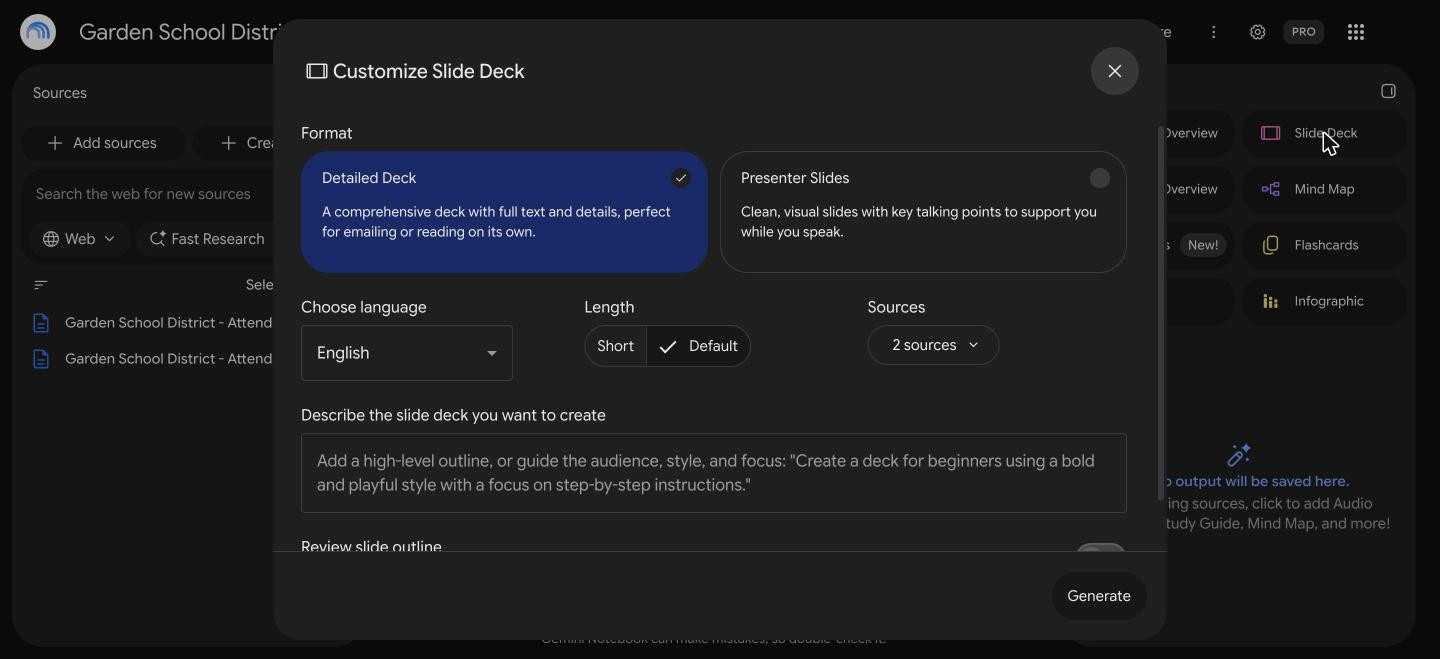
Customize Slide Deck window with Format, language, length, sources, and a box to describe the deck.
The Customize Slide Deck window.
  • Format: Detailed Deck is full of text and works on its own when you email it. Presenter Slides is cleaner and meant to back you up while you talk.
  • Language, Length (Short or Default), and Sources (which documents to use).
  • Describe the slide deck you want to create: paste the prompt above, or describe your audience and focus in your own words.
  • Review slide outline: turn this on if you want to approve the outline before slides are made.

Click Generate. Our demo deck took about five minutes. When it's ready, it shows up in the Studio panel:
A finished slide deck titled Attendance Support Program: Year-Over-Year Progress Report, open in the Studio panel.
The finished deck, built only from the two sample reports.

Click the pencil icon to revise individual slides by describing the change. Use the ⋮ menu to download the deck as PowerPoint or PDF.

Watch out for

  • The deck is only as good as your sources. Remove outdated versions so they don't compete with current ones.
  • Check every number. Answers stick to your documents, but read each slide against the source before it goes to the board.
  • Slides are images. Each slide is generated as a picture, so PowerPoint and PDF exports can't be edited as text. Make changes with the pencil icon, or use Gemini in Google Slides if you need a fully editable deck.

Best when: the deck is research-heavy and every claim has to trace back to a source. For a quick standard deck, use Gemini in Google Slides. For a deck from one file or a conversation, use the Gemini app with Canvas.

Before you use student data

Before you put student data into Gemini, confirm your district uses Google Workspace for Education and that you're signed in with your school account, not a personal Gmail. Not sure? Check with your tech department first.

Want a year of this?

Field Trip is a year of hands-on AI training for district and school office teams: one course a month, instructor feedback on every activity, and a cohort of peers.

See Field Trip